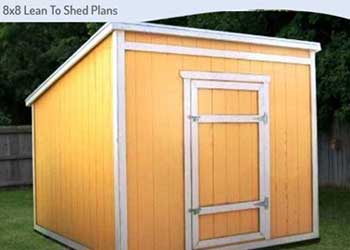
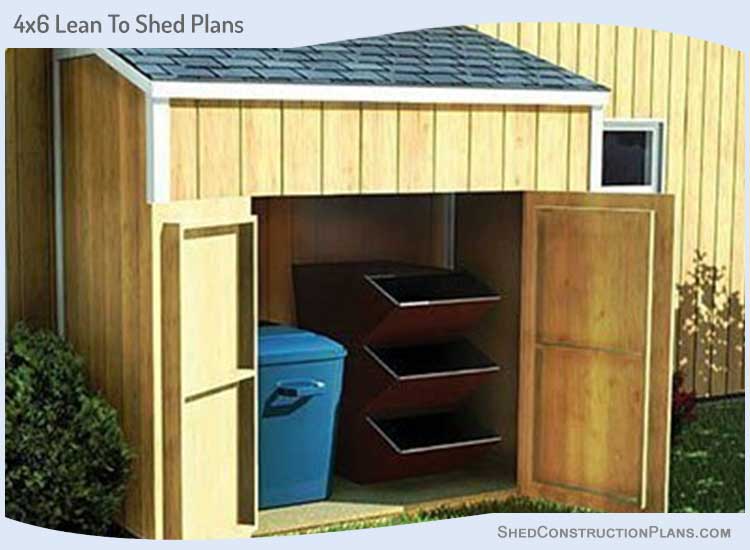
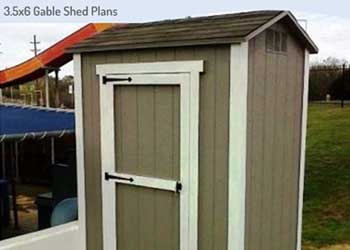
Here are some 4×6 lean to shed plans & blueprints that can be used for constructing a perfect tool shed. It can also be used for storing any kind of lawn equipment.
It’s simple design and moderate size will allow you to build this shed quickly on a limited budget.
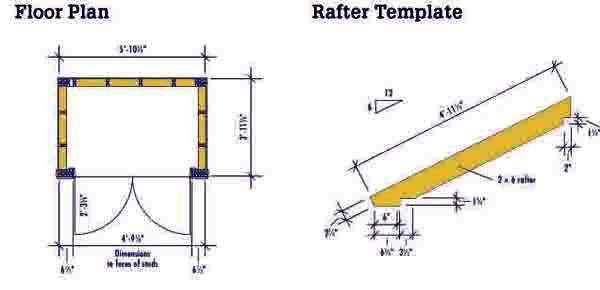
Lean To Shed Plans For Building Foundation & Floor Frame
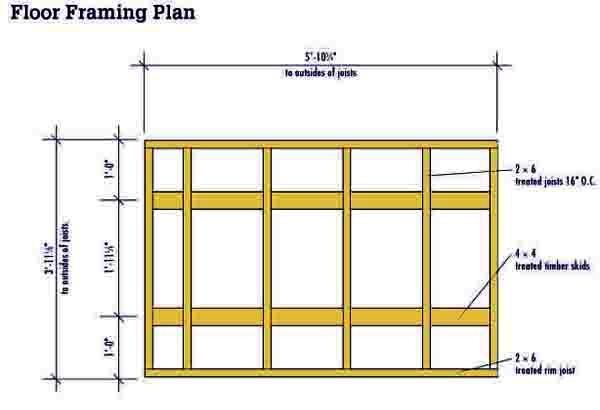
- Lay down a 3 inch thick layer of compressed gravel on the site where the shed will be built.
- Create two skids of length 70.5 inch using 4×4 lumber.
- Use 2×6 lumber to make two 7.75 inch long rim joists and six 44.75 inch long joists.
- Lay out the skids on the floor and create the floor frame as shown in the lean to shed plans diagram.
- Fasten the floor frame onto the skids using 4 clip angles after confirming that the frame is accurately square.
- Nail 0.75 inch plywood sheathing over the floor frame.
Lean To Shed Blueprints For Constructing Walls Of The Shed
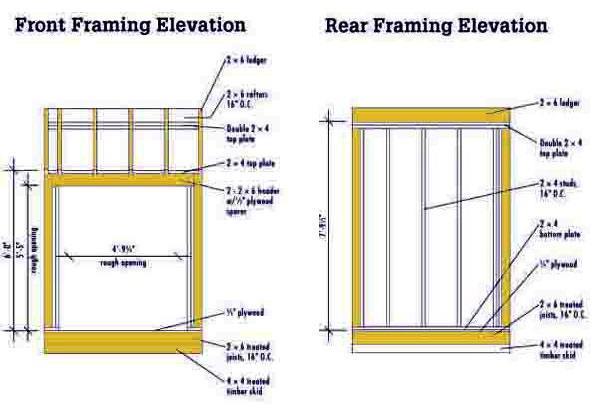

- Create four 89 inch studs, four 69 inch studs and two 47.75 inch bottom plates for building the side walls.
- Make four 63.25 inch jack studs, one 7.75 inch top plate and one 63.75 inch bottom plate for constructing the front wall.
- One 63 inch bottom plate, six 89 inch studs and two 70.75 inch top plates would be needed for making the rear wall.
- Trace out the positions of the studs on the wall plates.
- Secure the four studs of both side walls to their respective bottom plates using nails.
- Cut out a 63.75 inch long 2×6 board for creating the door header.
- Craft and hoist the forward and backward walls but don’t attach their top plates yet.
- Fasten the corner studs taking care they are vertical and then attach the top plate of the back wall level with the edges of the side wall studs.
- Similarly install the top plate of the front wall.
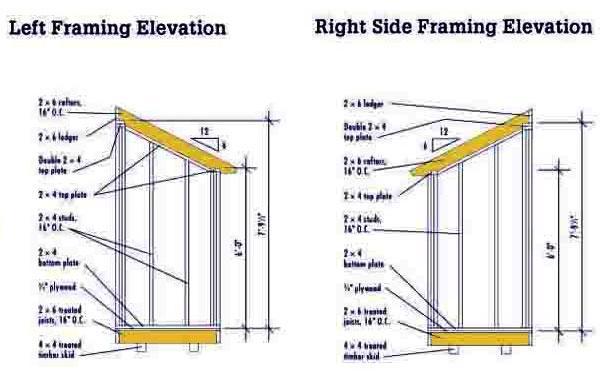
Slant Roof Shed Plans For Crafting Roof Rafters
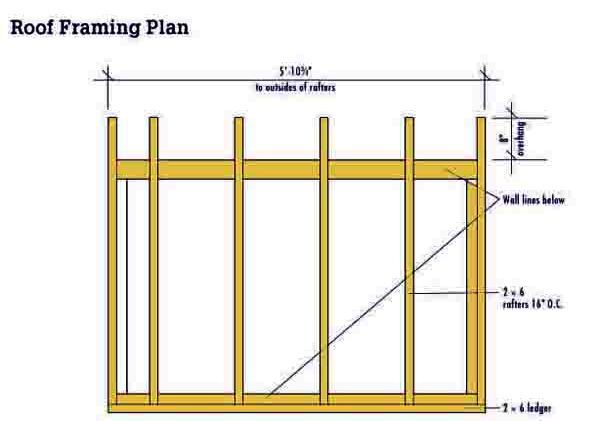
- Create six rafters using 2×6 lumber as shown in the diagram.
- Make a 70.75 inch ledger board and bevel the upper boundary at a 26.5 degree angle.
- Trace out the layout of the rafters on the wall plates and the ledger board as displayed in the diagram.
- Attach the ledger board parallel with the back wall and then connect the rafters.
- Create a top plate that will fit between the forward and backward walls and then miter its ends at a 26.5 degree angle.
- Nail the plate parallel with the rafters.
- Trace out the location of the studs over the bottom plates of the side walls and then make the same marking on the top plates using a plumb bob.
- Saw of the edges of the studs so that they fit accurately and miter their upper ends at a 26.5 degree angle.
- Attach the studs to the frame with nails.
- Nail plywood sheathing over the walls leaving about half an inch overlapping the floor frame.
- Attach 1×4 fascia on the lower ends of the rafters and 1×8 fascia on the upper ends of the rafters.
- Every fascia should be about 0.5 inch over the rafters so that they are parallel to the roof deck.
- The fascia at the rear and front must be long enough to cover the fascia on the sides.
- Create the side fascia with 1×8 lumber and cut to appropriate length so that they touch the fascia at the front.
- Cut the 1 x 8 side fascia to length and then clip the bottom front corners to meet the front fascia install the side fascia.
- Cover the roof frame with 0.5 inch plywood sheathing starting from the lower roof boundary.
- Fasten the forward boundary of the roof with a metal drip edge.
- Lay out building paper on the sheathing and then attach roof shingles.
- Secure drip edges to the sides of the roof.
Related:
Garden Tool Shed Plans Blueprints
Lean To Storage Shed Plans For Adding Doors, Windows & Trimming
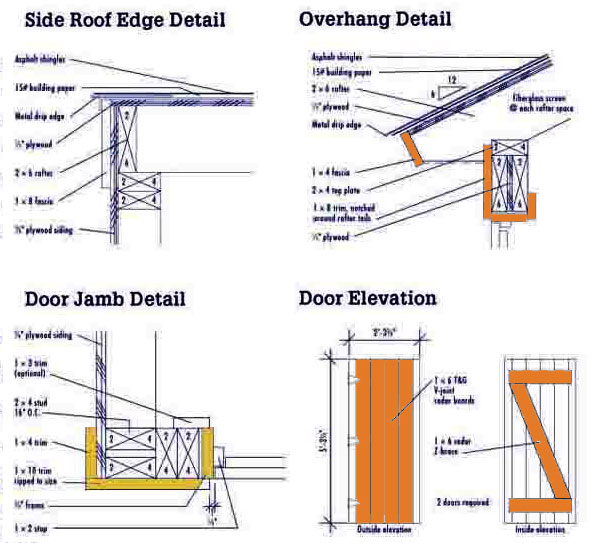
- Saw and take out the plate piece at the bottom of the opening for the door.
- Create a 57.5 inch long board using 1×4 lumber that will serve as the head jamb.
- Make two 64 inch side jambs.
- Secure the head jamb on top of the side jambs using screws.
- Attach the doorstops to the forward boundaries of the jambs.
- Fasten the door frame inside the wall opening using galvanized nails.
- Create six 63.75 inch long tongue and groove boards using 1×6 lumber for building each door.
- Nail the boards together and trim their ends to make the width of the door at 27.6 inches.
- Create Z braces for the door and attach them to the door using building adhesive and screws.
- Hang each door using three strap hinges.
- Attach the trim over the door such that it covers the side jambs about 0.25 inches on either side.
- Create the horizontal and vertical boards for trimming using 1×10 and 1×8 lumber respectively..
- Create a notch on the vertical trim boards so that they fit over the rafters as displayed in the overhang diagram.
- Create notches on the upper ends of the horizontal trim boards so that they can sit between the rafters.