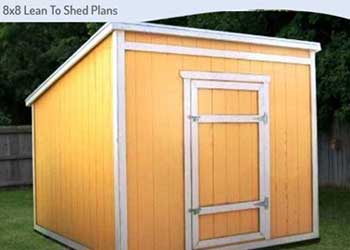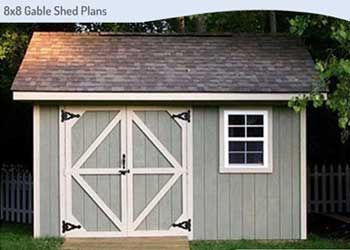
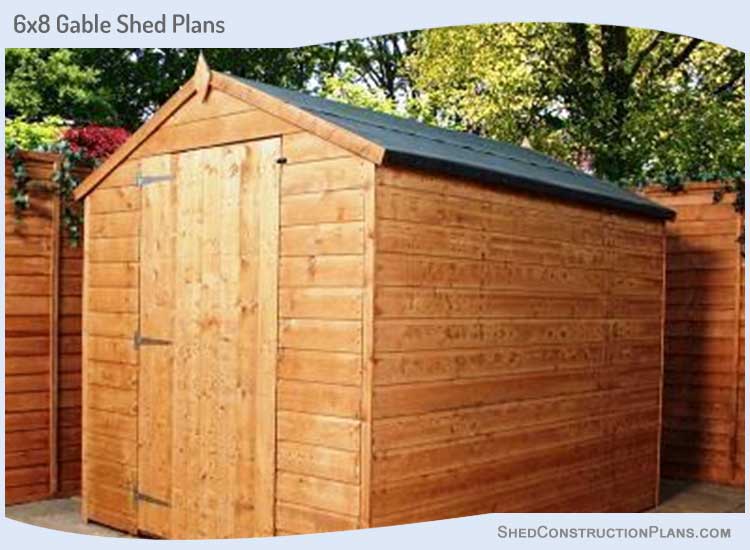
These 6×8 shed plans & blueprints show you how to build a simple garden shed with a gable roof. Only simple woodworking techniques are required for making this shed.
Constructing a shed is the ideal method for creating that extra space you need for storing your outdoor gear,
Although the shed can be used as a storage building, it can also add to the aesthetic beauty of your yard or garden. You can further add your personal touch to the shed by customizing it with accessories.
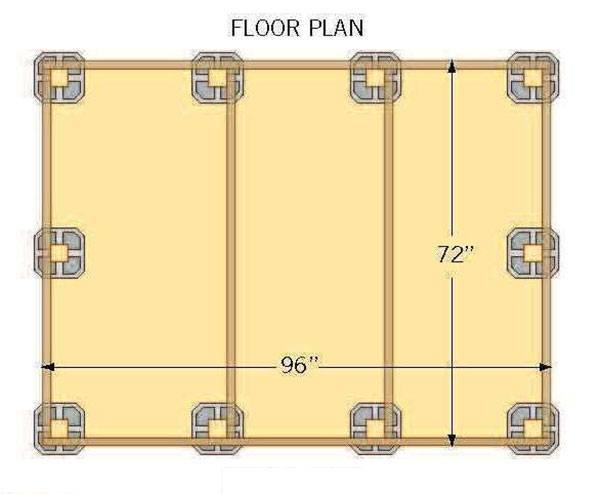
6×8 Storage Shed Architecture Plans For Building Floor Frame
- Choose a level and dry patch of ground in your garden or yard for building your shed.
- If the ground is not perfectly level then the blueprints given here will enable you to make corrections to the level of the floor.
- The foundation rests upon pre-fabricated deck blocks made of concrete.
- One deck block is placed at each of the four corners of the shed and two more blocks along the 8 foot long sides. One block is placed in the center of each 6 foot side.
- If heavy items are going to be stored in the shed then it is advisable to place 3 deck blocks instead of two along the 8 feet long walls.
- Each deck block contains a central gap for holding a typical 4×4 post used for supporting the deck.
- Place the deck blocks on the soil as shown in the diagram. Ensure that the land on which each block is resting is at least approximately level.
- Put some 2×6 boards along the edges of the upper grooves of the blocks to check that they are all in a straight line.
- Align 2 rows of 4 blocks parallel with each other for creating the longer walls.
- Take and compare the diagonal measurements between the rows to check that they are correctly square.
- Once the 8 feet walls are squared and aligned, place one block at the center of the 6 feet long walls
- Now remove the 2×6 boards and place a one foot long 4×4 post into every deck block vertically in the central gap of each block.
- The 2×6 boards that will create the outer boundary of the floor frame are supported on the outer top edges of the deck blocks touching closely with the faces of the 4×4 posts.
- Determine which block is the highest by using an 8 feet long 2×6 board and a 4 foot level. This block is where you will begin constructing the floor frame.
- Screw the 2×6 board to the 4×4 post on the highest deck block and then hoist the other end of the 2×6 to the 4×4 post at the other corner and screw it into place.
- Do the same for the remaining 3 sides of the floor frame and ensure that all four 2×6 perimeter boards lie in the same horizontal plane.
- Shave off the extra length of the 4×4 posts as needed so that they are all flush with the upper plane of the 2x6s.
- Now place the 2×6 floor joists on the perimeter boards such that they run between the two 8 feet long walls.
- Check that every joist fits snugly between the outer boundaries of the floor frame.
- Secure the joists to the sides of the 4×4 posts with deck screws.
- Finish the floor frame by securing each joint with 3.5 inch galvanized screws.
- Cut out spacers using 1.5 inch thick timber to stuff the space between the lower side of the 2x6s and the upper side of the deck blocks.
- Secure a 5/8 inch thick plywood board on top of the floor frame using 2.5 inch thick screws to form a subfloor. This will strengthen the floor and ensure it can bear heavy weights for long duration.
DIY Shed Wall Crafting Blueprints
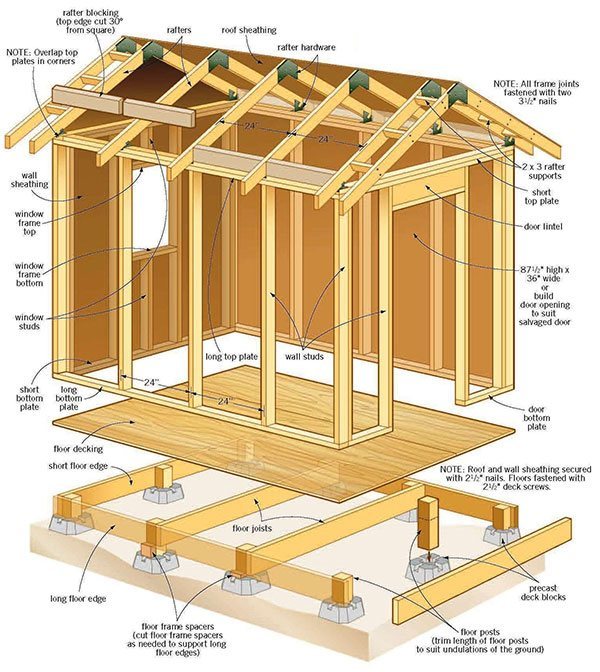
As you can see from the shed blueprints, the walls are built using 2×4 top and bottom plates that run horizontally close to the perimeter of the shed.
The walls are held up by vertical wall studs such that the shorter walls are contained within the long walls.
The walls are secured to each other at each corner using 3.5 inch wood screws and coinciding top plates.
- To build the wall frame, first temporarily fasten a top plate and bottom plate face to face using screws. The plates are made using 2x4s.
- Now set this pair on its edge over the floor and mark the location of the wall studs on the edges of both 2x4s.
- Keep the space between centers of the stud at 2 feet.
- Refer to the diagrams for the complete details on how to craft the openings for the windows and doors.
- These diagrams don’t display measurements so that you can size the door and window as per your need and budget.
- The doors can be directly secured to the frame of the shed using hinges.
- When creating the window frame large enough to fit the window of your choice, make sure to leave and extra 0.5 inch space on all four sides of the frame for making fine adjustments when fitting the window.
- Now spread out the top and bottom plates on the floor at a distance of 8 feet from each other and attach 92.5 inch studs between them using nails.
- Once one wall is completely built, use a friend’s help to hoist it into place and secure the bottom plate of the all to the floor board using 4 inch galvanized screws.
- Align the screws such that they run into the 2×6 boards of the floor frame.
- Create and hoist the other walls similarly. Align them such that their corners and plumb, and screw them to each other with deck screws.
- Fasten another layer of wall plates over the top plates of the walls using screws such that they overlap over the corners.
- Finally sheath the wall frame. Pressure treated plywood siding is the best choice for sheathing.
- This siding contains vertical grooves that are aesthetic and they can be coated with stain or paint easily.
- First sheath the walls completely from the outside and then carve out the openings for doors and windows.
- Use the door/window opening in the wall frame you constructed earlier as a guide and cut out the sheathing using a reciprocating saw.
Diagrams For Constructing Roof Frame
You can simplify the work of building the roof for your shed by using steel plate connectors for connecting the rafters. This will save you the effort of making complex cuts into the rafter.
It will also increase the strength of your roof.
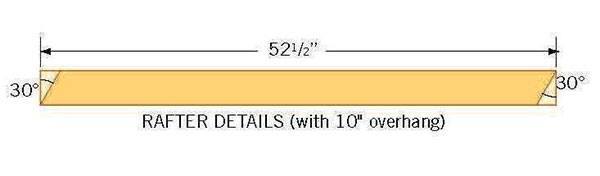
- Carve the 2×4 rafters at a 30 degree angle as shown in the roof schematics.
- Attach them to the top of the walls using screws and steel peak brackets.
- After the rafters have been secured into position, create two sections of triangular wall sheathing for covering the gable ends.
- Nail this sheathing to the faces of the outermost rafters and to the top of the wall.
- Fill the spaces between the rafters and the wall plates using pieces of 2×6 blocking.
- Use a table saw to cut out the top of the blocking and angle their top sides to match the slope of the roof. This will ensure that they will fit correctly inside each space.
- Screw the blocks to the top plate.
- Secure 3 rafter supports to each rafter at the end using screws and extend the roof frame.
- Now attach the overhanging rafters with these supports.
- Finally cover the roof with half inch thick plywood sheathing.
- It is easier to build the roof standing on a scaffold than on a ladder. So build the scaffold on the inside of the shed when making the roof and then later take it outside near the eaves when you are shingling the roof.
- Lastly coat you shed with two layers of paint.