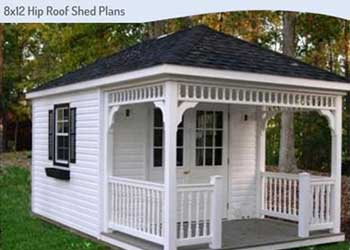

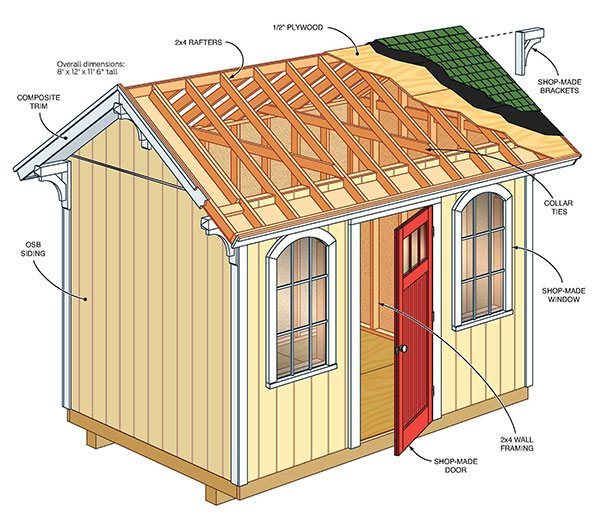
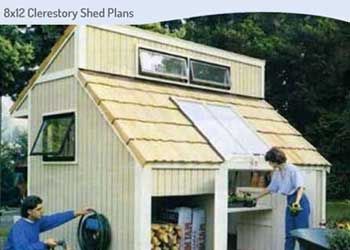
These 8×12 garden shed plans and blueprints will help you construct a beautiful, wooden gable shed in your backyard.
This shed has a simple yet pleasant look and feel, especially due to its top-quality doors and windows. Each section of the shed can be built separately in your garage and finally assembled on site.
This makes its construction a lot faster and easier. It also uses low-cost material to ensure you can build your shed on a budget.
As the different components of the shed can be constructed separately, you can setup this shed at any location even if the area is remote or if the ground slopes.
Only basic woodworking tools are required during the crafting of this shed. This includes a circular saw, router, miter saw and table saw.
You can easily complete this shed in a week with the help of a friend.
8×12 Garden Shed Plans For Building Floor Frame
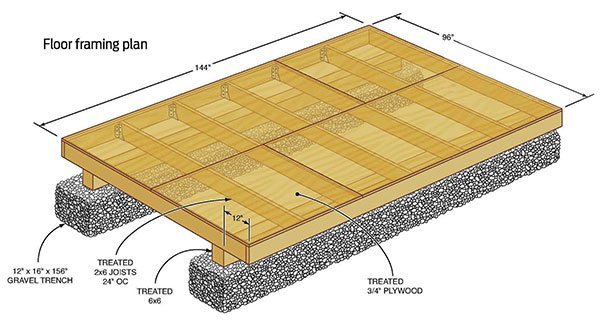
- Once you have finalized the location where you will be building the shed, excavate two parallel 16 inch wide trenches at a distance of 66 inches from each other.
- Each trench will be 2 feet deep and 13 feet long.
- Stuff each trench with a 3 inch deep layer of gravel and press it down. Then add more gravel and compact it. Keep repeating till the trench is completely filled with gravel.
- Level the topmost layer of gravel using a wooden board. Verify that the gravel is level with the ground and that the two gravel filled trenches are level with each other.
- Craft two 12 feet long 6x6s and place them on the gravel parallel to each other. Check that their outer edges are 6 feet from each other.
- If the two 6x6s are not level with each other, raise the lower end of the beam to the right height by stacking pieces of treated wood over the 6×6.
- Square the two 6x6s by correcting the placement of one of the two beams. Check the diagonal measurements between the two 6x6s and confirm they are equal.
- Construct the base of the shed using 2x6s placed at an on-center spacing of 2 feet from each other. Then cover the floor frame using 0.75 inch thick treated plywood boards.
8×12 Garden Shed Blueprints For Framing The Walls
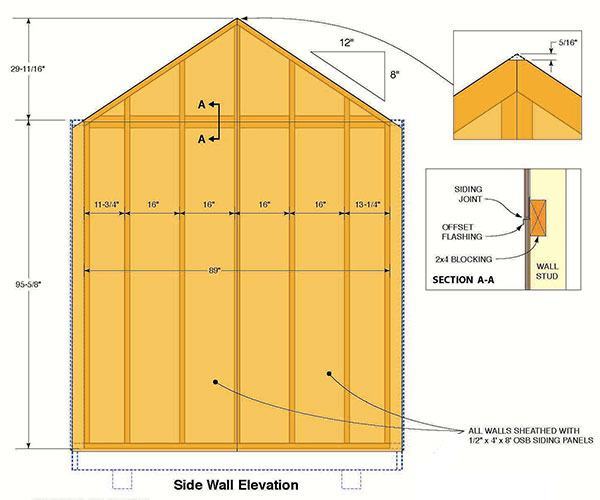
- You can construct the side walls on the shed base and then hoist them into position.
- Draw lines using chalk on the plywood shed base about 3.5 inches from the boundaries of the base. These markings will indicate the inner edges of the walls.
- Check that the lines are about 89 inches from each other and are completely parallel.
- Now draw a chalk line through the center. This will be used to verify that the angled upper plates meet in the middle.
- Draw lines for the peak and craft 2x4s that will fit within these lines. Secure them to the plywood using screws and then attach the center studs.
- Secure plywood siding to the frame using nails. Ensure that the siding overhangs the frame on each side by about 3.5 inches. Verify that the top corner has been correctly trimmed to match with slope of the top plate.
- Secure blocking amongst the studs using nails for giving additional support to the upper edge of the siding.
- Once the wall has been built, move it to a different location and then build the other side wall.
- After the other side wall has been constructed, move that also to make space for creating the roof sections.
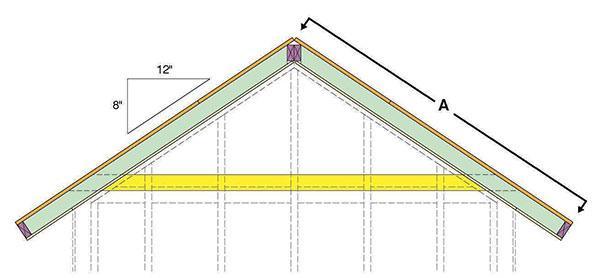
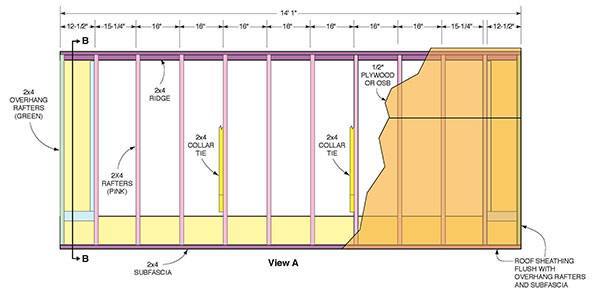
8×12 Garden Shed Diagrams For Constructing Roof Frame
- You can avoid a lot of work that would have to be done standing on a ladder, by constructing the roof inverted on your shed base.
- Ensure that the frame is correctly square and the 2x4s which from the boundary are accurately straight before you attach the soffit.
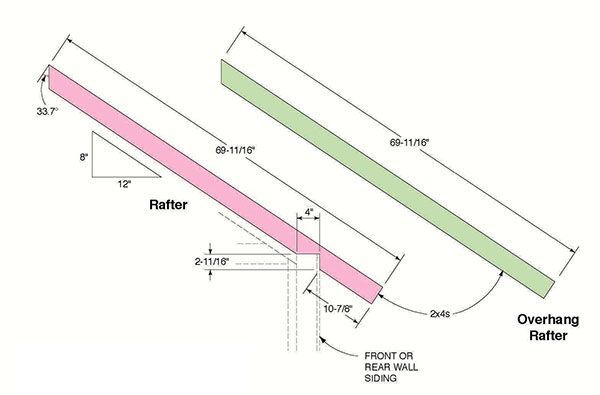
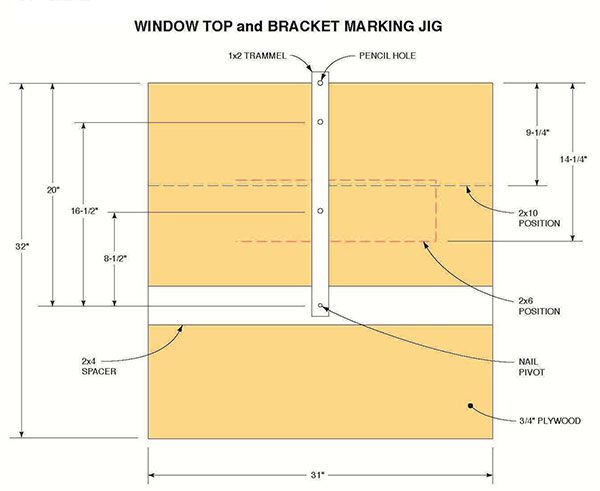
- Begin by crafting rafters using the measurements shown in the shed diagram.
- Don’t create bird’s mouth cuts on the four rafters that will be used on the ends.
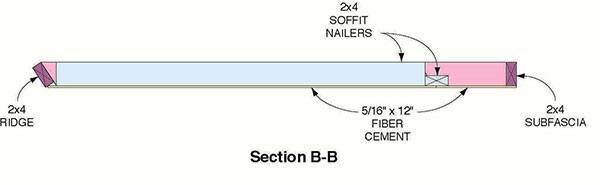
- Craft 2x4s for the subfascia and ridge to the measurements shown in the diagrams and trace their positions on the rafters,
- Align the rafters with the markings and secure them through the subfascia and ridge using galvanized nails.
- Once the roof has been built, align the subfascia with the chalk marking on the shed base and secure it in four places using toe screws. This will help keep the frame level when you secure the soffit.
- Check the diagonal lengths of the roof frame to ensure that the frame is square. Then secure the soffit to the roof frame using box nails.
- Build the other half of the roof similarly.
Hoist The Walls and Roof Sections
- Hoist one of side walls into place and place its bottom plate over the shed base.
- Drive 3 inch wood screws into the plate to hold the base of the wall in place.
- Now hoist the back wall into position and secure it with the side wall using nails. Align the inner edge of the bottom wall plate with the base of the shed as needed with the assistance of a helper standing outside the shed.
- Raise the other end wall and lastly the front wall.
- Nail together all the corners and ensure that the top plates of adjacent walls are level with each other.
- Using the assistance of three helpers hoist the roof section into place and place it on the front and back walls such that the bird’s-mouth fits over the top wall plate.
- Verify that the ridge is correctly lined up with the top of the wall.
- Fasten the roof panel by driving nails through the bird’s mouth of the rafters into the upper wall plate.
- Finish the roof frame by securing the ridges together and fastening two collar ties about 4 feet away from each other.
8×12 Garden Shed Plans Blueprints For Assembling Doors and Windows
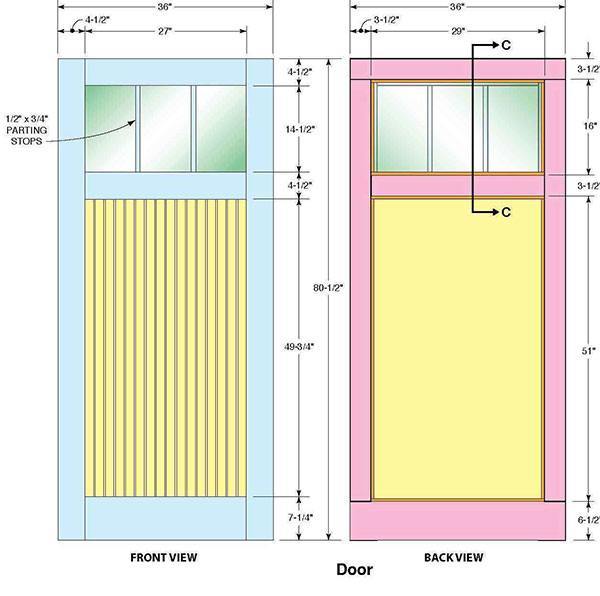
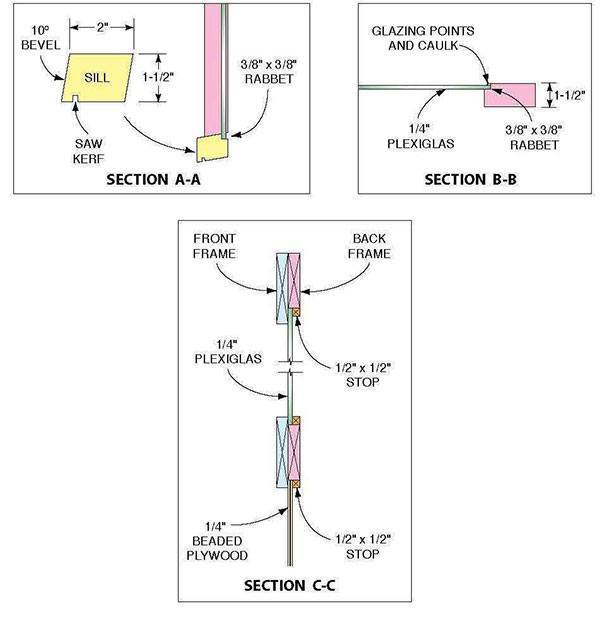
- Attach the door to the frame by securing the door to a 1.5 inch thick piece of trim and then fasten the trim to the door frame using screws.
- To trace and cut identical segments in the door and trim for attaching the hinges, first clamp the trim to the door and then mark the hinge cutout on both the door and trim simultaneously.
- Use a router with a straight bit for cutting the recesses for the hinge into the wood.
- To suspend the door, align a 2×4 with the base of the siding and secure it to the wall with screws.
- Then place the door on the 2×4 and fasten 3 inch screws through the trim into the door frame, for securing the door in position.
- Complete the door setup by fastening the side and top trim sections.
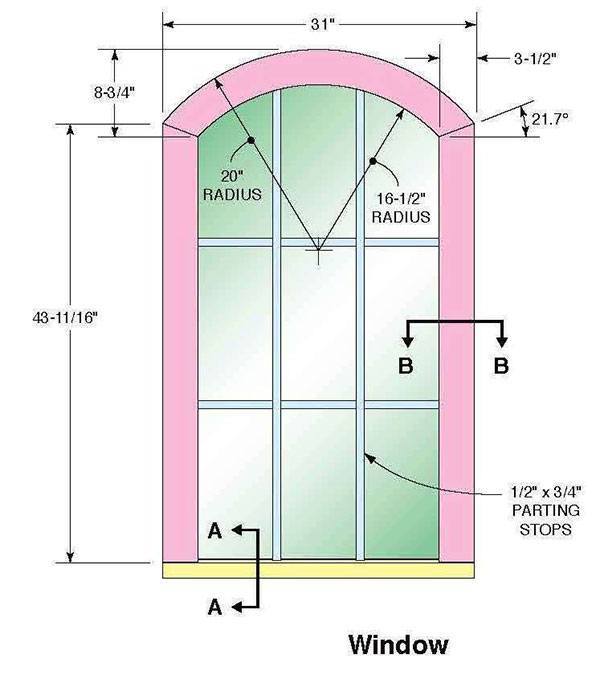
- Use a similar process for attaching the windows.
Finishing The Shed
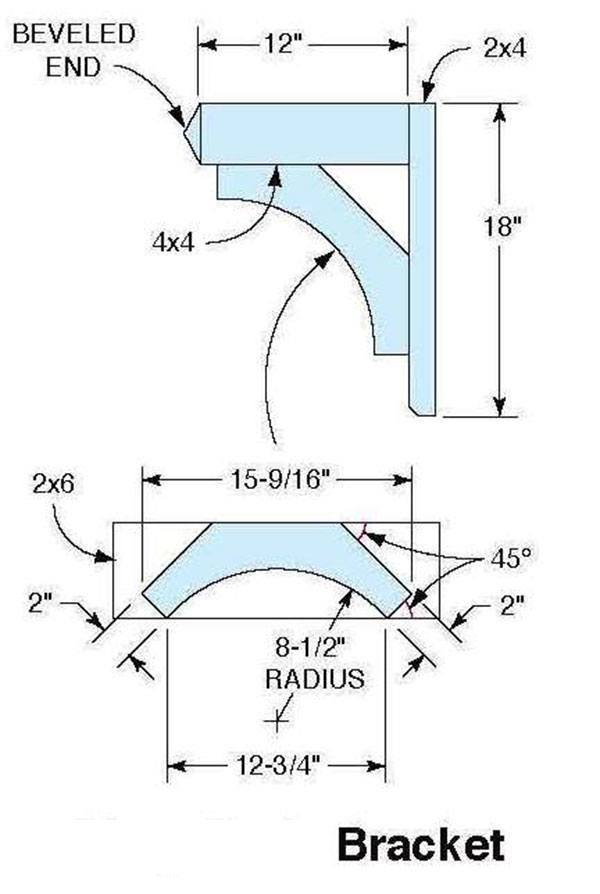
- Refer to the diagrams for details of external trim. Begin by attaching the brackets.
- Align the outer boundary of the bottom brackets with the siding face, then secure them tightly to the soffit and attach them to the wall using screws.
- Align the top bracket at the center of the peak and drive it tightly into the soffit.
- Begin with the sections that go below the brackets and cover the corners using the corner board.
- Let the front corner board overlap with the side one.
- Attach the fascia boards around the brackets and secure the shingle molding.
- Verify that the shingle molding is level with the top of the plywood roof.
- Install the shingles.
- Paint the doors and windows first.
- Then fill the nail holes and caulk the spaces around the door and window frames.
- Now paint the remaining parts of the shed with two coats of acrylic paint.