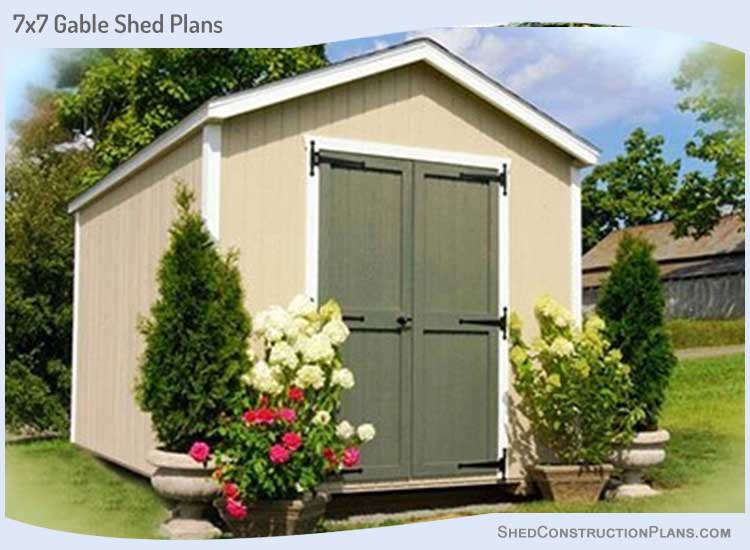
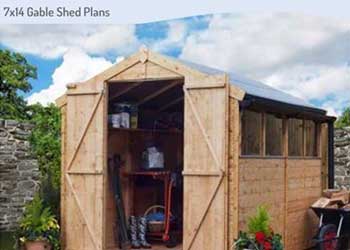
These 7×7 shed plans & blueprints show you how to build a modest garden shed with an optional hutch. This shed can be used for storage or as an outhouse.
It can even be converted to a workshop by adding a workbench. If you put a few shelves on the walls and add some potted plants then you can also turn it into a potting shed.
#1. 7×7 Shed Plans For Building The Shed Foundation
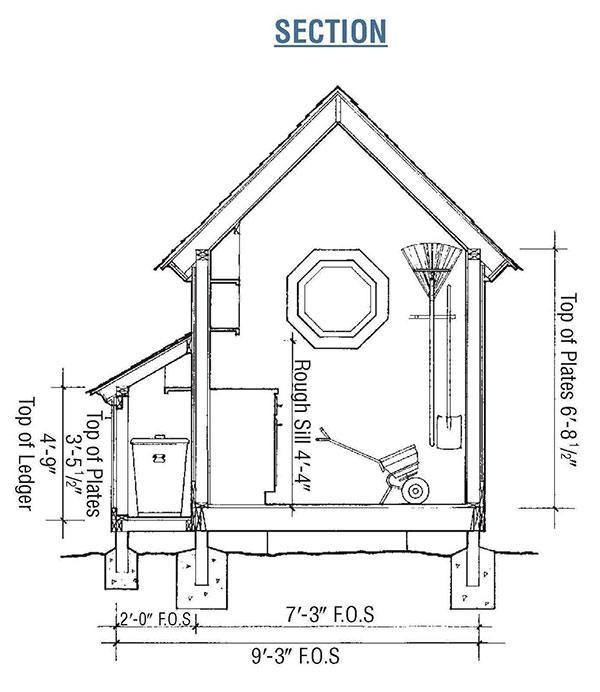
- Create the pits for the footings at a depth which is more than the frost line in your area.
- Make the pits about one foot wide to allow for minor corrections later.
- Install four 4×4 posts into the four pits by using temporary braces to hold them vertical.
- The concrete will be poured in the pits later.
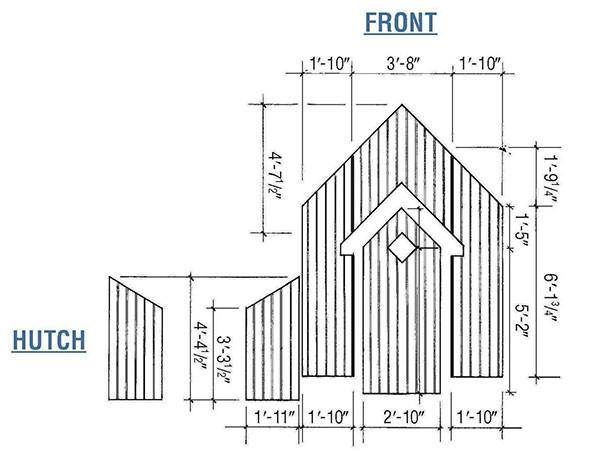
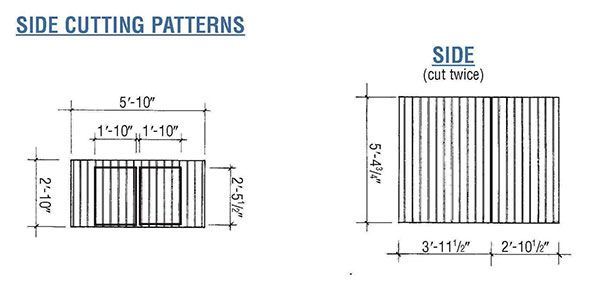
#2. Gable Garden Shed Plans For Crafting The Wall Frame

- Attach the rim joist with the foundation posts using hangers such that their outer faces remain parallel.
- Connect the floor joists to the rim joists on the sides with hangers as shown in the 7×7 shed plans.
- Nail plywood decking to the floor.
- Create the walls using a top plate, studs and a sole plate. The studs must have a distance of 16 inches between them.
- Craft the openings for the doors and windows into the walls and let the sole plate remain below the door.
- Hoist the walls and nail them to the foundation posts using galvanized nails.
- Verify that the foundation posts are vertical and then fill the pit around each post with concrete.
- Once the concrete has dried, saw the tops of the posts to make them level with the side walls,
- Install another top plate over the side walls overlapping the top of the posts.
- Fasten another top plate over the rear and front walls covering the posts in the other direction.
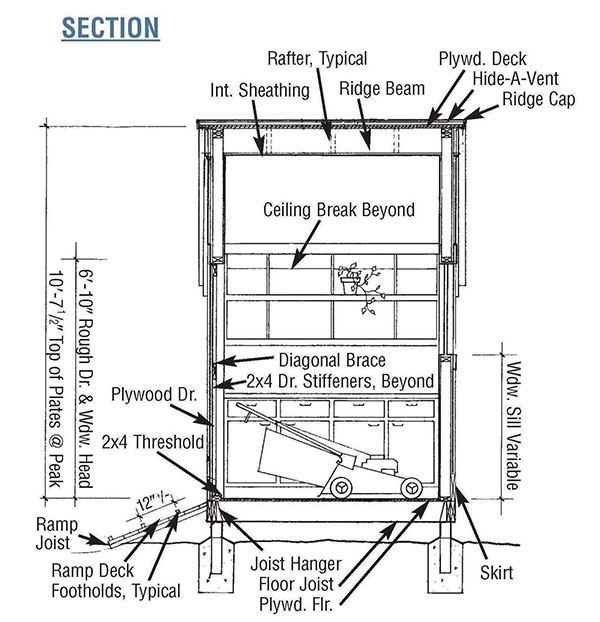
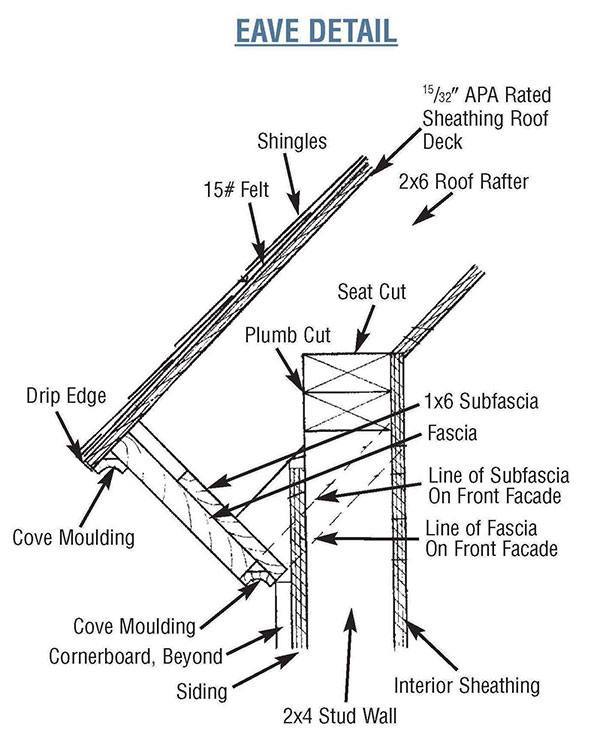
#3. Construct The Roof Frame Of Your Backyard Shed
- Install the ridge board among the rear and front walls by toenailing it.
- Make the birds mouth cuts of the rafters about 3.5 inch long at the place where they will fit over the top plate.
- The seat cuts will be at right angles to the plumb cuts.
- Allow the tails of the rafter to be longer than needed, they can be sawed off later.
- Connect 5 rafters on either side of the ridge beam by spacing them out evenly as shown in the diagram.
- Saw off the tails of the rafters such that the fascia will accurately fold around the corners.
- The siding furrows touch the sub-fascia such that there is enough space for ventilating the roof.
- Attach plywood sheathing to the roof and then cover it with felt and shingles.
- Take care to also cover the ridge beam when laying the shingles.
- Slide the roof flashing and door trim beneath the siding before securing them to the studs.
- Slide the Z flashing beneath the lower end of the siding and on top of the skirts.
#4. Outdoor Shed Plans For Creating The Door And Window
- The door is created using siding and is strengthened with 2×4 lumber boards.
- Secure the door to the frame using three strap hinges fastened to pads such that they remain level with the trimming of the door.
- Connect a brace from the upper hinge to the lower end of the door diagonally for strengthening the door even more.
- You can create the window using polycarbonate plastic held inside a simple wooden frame and attach thin sections of lattice for making it more aesthetic.
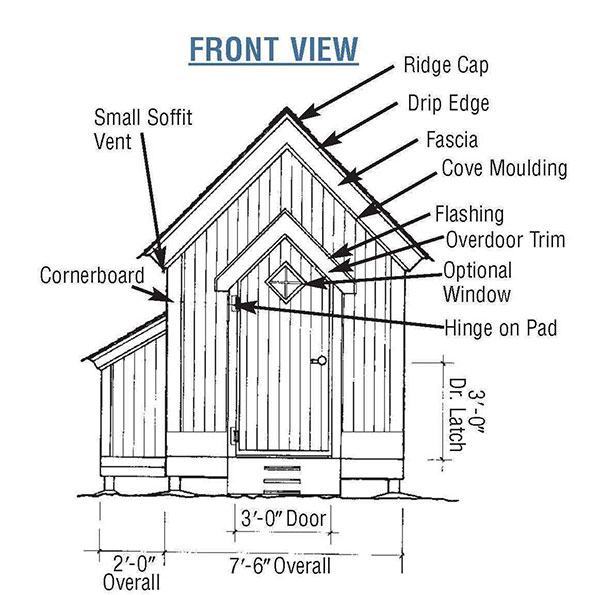
#5. Add Trimming To Your Gable Shed
- Nail the fascia and sub-fascia over the siding and cover it with molding so that the upper and lower edges are trimmed.
- Connect a metal drip edge over the fascia and below the deck of the roof.
- Secure corner boards to the back and front facades such that they touch the side corner boards.
- Saw the corner boards to appropriate length so that they fit snugly between the fascia and skirts.
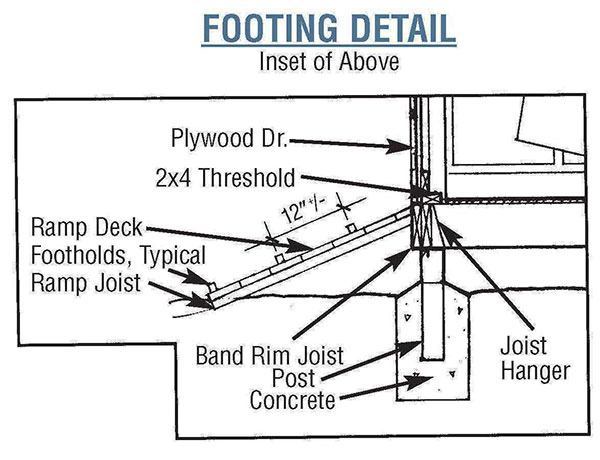
#6. Making The Ramp
- The ramp can be created using 2×6 lumber fastened to decking boards.
- Ramp should be long enough to accommodate an angle of 45 degrees or lesser.
- Attach footholds at intervals of one foot over the ramp so that you can easily move heavy objects over the ramp without slipping.
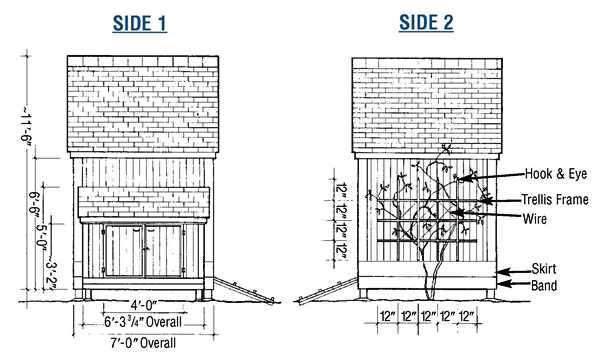
#7. Assembling The Trellis
- Cut out and attach the lattice as displayed in the diagram for the elevation.
- Trace the line where 2 boards cover each other with a pencil.
- Chisel the wood on either side of the pencil line to about half the thickness of the wood and create half-lap connections. Put the structure together again by connecting the boards.
- Create support for your potted plants by weaving among the wooden boards using plastic coated wires.
- Once the patter is complete you can nail the joints to each other.
- Suspend the trellis from hooks connected to screw eyes so that they can easily be removed later for cleaning or maintenance.
#8. Creating the Hutch and Adding Final Touches To Your Outdoor Shed
- Steps for creating the hutch is same as the steps we used for making the shed with the only difference that the hutch is connected to the shed using a ledger plank.
- Cut the remaining 8” 4 x 4 posts in half to make the two corner posts. Add flashing where the roof meets the shed siding.
- Seal all the joints around doors and windows with waterproof filling material to make sure that no water can get in during rains.
- Paint or stain the shed as per your preference.
#9. Interior
- Connect all necessary accessories to the interior of the shed as per your requirement.
- If you wish to turn it into a workshop or potting shed you can cover the inside walls with plywood siding.
- If you want to use the shed for storage then cover the walls with hardboard panels.