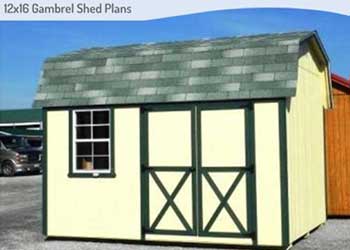
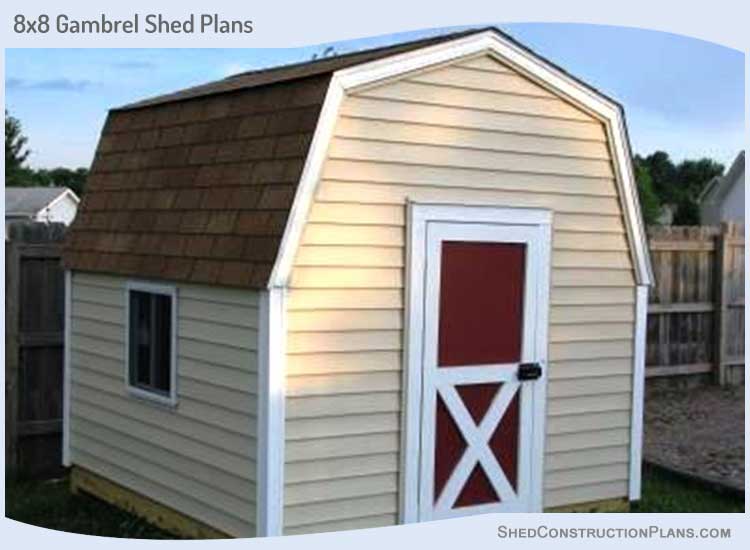
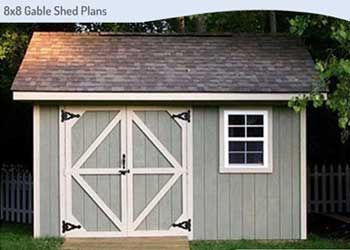
These 8×8 gambrel storage shed plans & blueprints will show you how to build a sturdy and beautiful wooden shed quickly and easily.
This shed is perfect for storing gardening tools and equipment. The gambrel roof design allows this shed to have more storage space at the top.
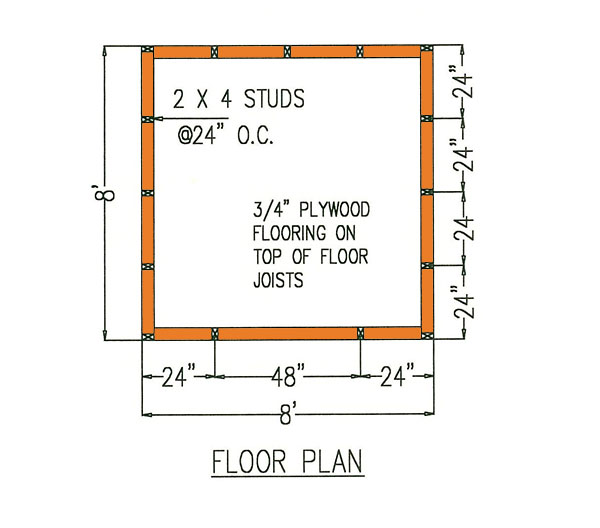
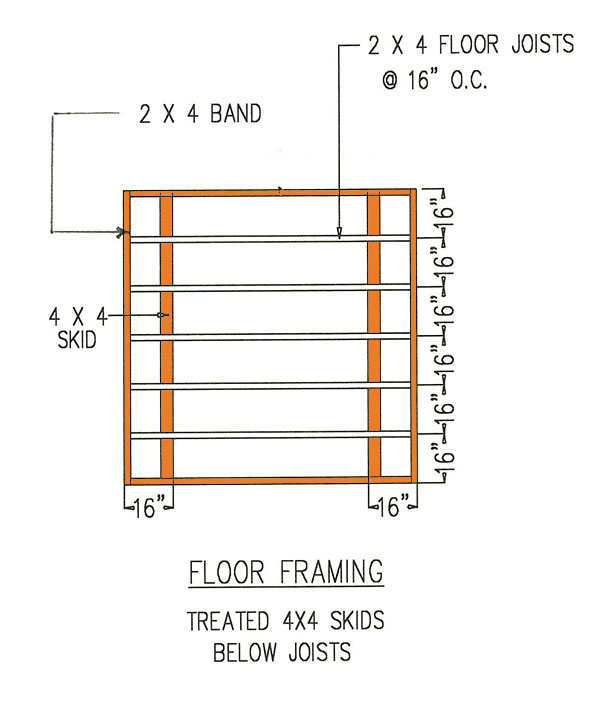
Complete rafter details and floor diagrams are included in these gambrel shed plans.
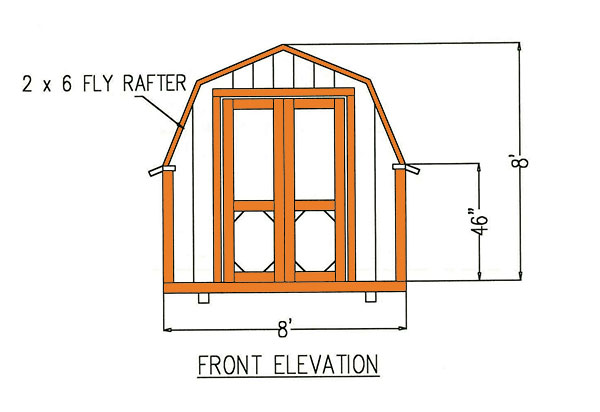
#1. 8×8 Gambrel Shed Plans For Building The Shed Floor
- Clear out and level the ground where you would be constructing the shed.
- Dig out the dirt and lay down a 3 inch deep layer of gravel to make a strong foundation.
- Cut out skids using 4×4 pressure treated lumber and lay down the skids on the ground as shown in the gambrel shed plans diagram.
- Craft 7 floor joists using 2×4 lumber and lay them on the skids at a distance of 16 inches from each other.
- Place the band boards across the joists and fasten them to the joists using nails.
- Arrange the skids such that the joists are lying over them and are about 16 inches from the edge of the band boards.
- Secure the skids with the joists by toenailing them.
- Verify the lengths of the diagonals of the floor frame to ensure it is correctly square.
- You can further strengthen the foundation by placing concrete blocks on the floor and then nailing the floor frame to the blocks.
- Use shingles as shims to align the height of the blocks so that they are all perfectly level with each other.
- Nail plywood panels to the floor frame to create your shed’s floor.
#2. 8×8 Gambrel Garden Shed Plans To Make The Side Walls
- Fasten the top and bottom plates while they are laid out on the ground.
- Make the upper boundary of the top 2×4 plate level with the upper boundary of the siding and let it hang about 2 inches over the bottom plate.
- Once the wall is framed and the siding is secured, hoist it up and nail it into proper position.
- Secure the frame from the outside by driving nails through the lower siding into the band boards.
- Secure the frame from the inside by driving nails into the floor through the bottom plate.
- Construct and install the other side wall in a similar manner.
- The end walls will be built later.
#3. Gambrel Storage Shed Plans For Crafting The Roof Frame
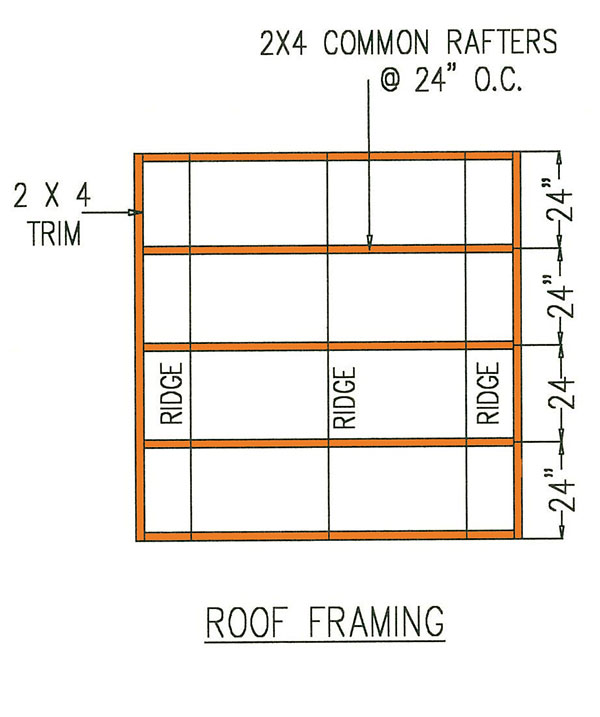
- Cut out rafters using 2×4 pine wood.
- Create ten 36 inch long rafters that are cut at an angle of 20 degrees at one end and 22.5 degrees at other end.
- Make ten more 36 inch long rafters that are cut at an angle of 22.5 degrees at both ends.
- Lay out two top rafters that have a 20 degree angle on the ground and nail a gusset into both rafters where they join with each other, thus creating a truss.
- The gusset should be approximately 8 inch wide and 16 inch long and made of half inch thick plywood.
- Ensure that the peak of the truss is exactly at the center and that its bottom width is equal to the width of the shed.
- Make four more trusses similarly by nailing together two 20 degree rafters and complete 5 trusses.
- Later nail the 22.5 degree rafters to the lower ends of the 20 degree rafters to form the slope of the gambrel roof.
- Once all rafters are built, set them on the walls and fasten them to the studs using nails.
#4. Gambrel Shed Blueprints For Creating the Shed Doors
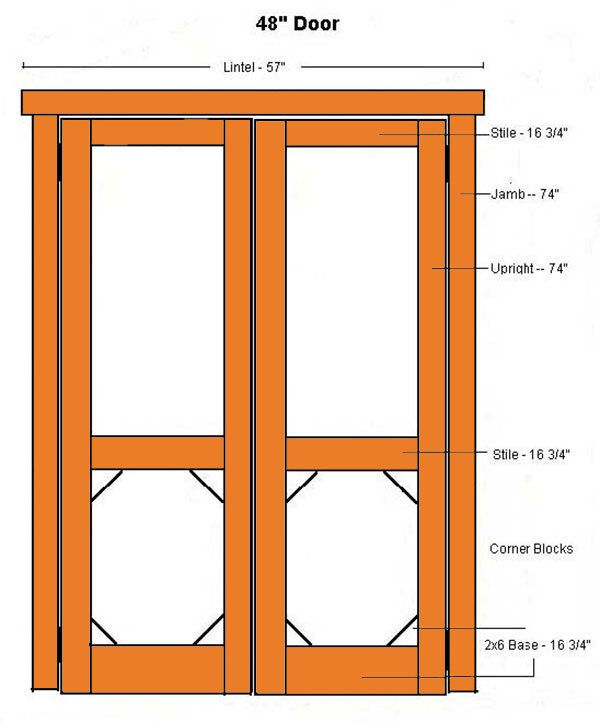
- Place the different pieces for creating the door face down on the floor.
- Secure the door uprights to the base and stiles using ridged fasteners.
- Put together the different components for the door and secure the corner blocks using nails.
- Attach two 4 inch butt hinges to the jamb and door for each door.
- Take care that the jamb runs across the top of the door an extra quarter of an inch to allow enough space for the doors to move freely once they are installed.
- Place an entire sheet of siding on top of the door frame with its face down.
- Level the lower boundary of the siding with the door bottom and cut as necessary to make it perfectly square.
- Secure the siding to the door frame by driving nails into the door frame and door jamb.
- Assemble the door pieces. Nail the corner blocks in place.
- As the door frame is still laid out on the floor, trace a line using chalk on the back of the siding such that it runs parallel to the top of door and make another line running between the jamb and the frame.
- Cut along the lines using a saw but don’t cut it out entirely so that the door does not swing out as you are hoisting it.
- Once the door siding is attached into the end wall then you can cut out the remaining sections of the lines using the saw and then the door will open outwards.
- Create the other door in a similar manner taking care that one door has a male lip while other has a female edge so that when the doors close they seal together tightly.
#5. Diagrams For Constructing End Walls Of An 8×8 Gambrel Shed
- Nail a 2×4 temporarily to the end floor joist taking care it is level with the siding bottom.
- This board will act as a ledge for seating the siding as you are nailing it so that you don’t have to hold it while nailing.
- Doors will be installed into the front siding so firstly setup the one with the male sticking out beyond the door.
- Place the siding over the ledge and secure it to the bottom with nails and then nail it to the side walls to make it square.
- Lastly secure the siding to the rafters.
- Now put the other siding panel containing the door over the ledge and align it correctly.
- Secure the panel using nails just as you did it for the other wall.
- Move inside the shed and setup a stud on either side of the door.
- Cut the stud as needed to fit underneath the rafter and then notch it surrounding the rafter.
- There won’t be any plates installed at the bottom or top of the end walls.
- Use a handsaw to cut out the opening for the doors into the siding panel.
- Attach the header for the door and allow it to fall about half inch below the top of the door opening.
- This will help the door header to also act as a stop for the doors.
- Move out of the shed and install the jambs for the door into the studs you just attached.
- Now remove the ledge that was nailed earlier under the doors and check that they can move freely.
- Siding for the back wall is attached similarly by nailing the studs to the rafters and the floor.
#6. Building The Roof Of Your Gambrel Shed
- Attach the half inch plywood sheathing for the roof starting from top of the rafters and move towards the bottom.
Stagger all joints and secure them at intervals of 8 inches using nails. - Cut out the siding from the side walls that overlap beyond the rafters using a router.
- Create and bevel the overhang and keep it handy for installation.
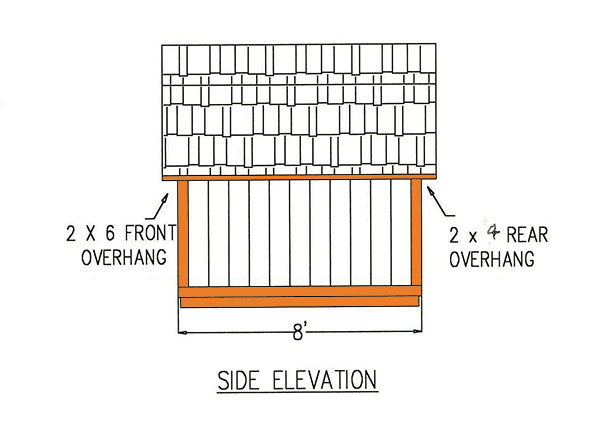
- Cut out the front fly rafters using 2×6 pine with a 20 degree angle at one end and 22.5 degree angle at other end.
- Make the bottom fly rafters with 22.5 degree angle at both ends.
- Fasten the front fly rafter to the front of the shed by toenailing it into the front truss.
- Create the rear fly rafters using 2×4 pine and toenail them similarly to the truss at the back.
- Now cut out the overhang so that it fits between the front fly rafter and the rear fly rafter and runs along the length of the shed.
- Secure the overhand to the top of the siding by driving nails every 24 inches.
- Create a block for filling the space where the overhang meets the fly and secure it using nails.
- This will also help to secure the trim at the corners.
- Attach the roofing underlayment to the roof siding and then secure wooden shingles over the underlayment using nails.
- Now attach the corner trim and attach a latch on the door for locking.