These 10×16 gable storage shed plans & blueprints will show you how to create a spacious wooden shed. This shed has large double doors and 3 windows.
It has an optional partition inside that can divide the inner space into a 4×10 area and a 10×12 area which allows you to use it as two separate rooms. This building can be the answer to all your outdoor storage needs.
#1. 10×16 Storage Shed Plans For Constructing The Floor Frame
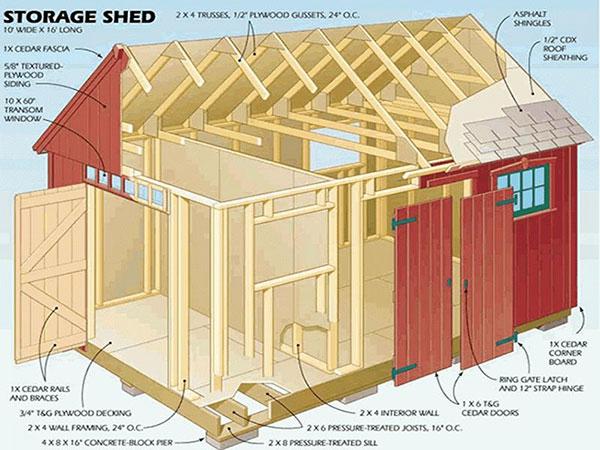
- Create the shed foundation using 12 concrete blocks.
- Arrange the blocks into 3 rows and 4 columns, spacing them 59 inches from each other.
- You can place the blocks directly on the ground or lay down a layer of gravel on the ground to keep it from getting moist during rains.
- Check that the blocks are level using a spirit level and a 2×4.
- If any block is lower than needed then use shims to hoist them to the required height.
- You can user shingles or thin concrete blocks as shims.
- Nail a 2×8 mudsill to a 2×6 board to create the forward and backward band joist.
- Place the mudsills over the concrete blocks such that they are laid along the forward and backward faces of the shed.
- Section another mudsill to lay over the center row of the concrete blocks.
- Place all the 2×6 floor joists over the mudsills and the two band joists as shown in the 10×16 shed plans.
- Keep a distance of 16 inches between the joists and nail them down.
- Fasten the four corners of the floor frame to the ground with 4 ground anchors using spikes driven into the soil.
- Build the floor of the shed using 0.75 inch thick plywood pieces connected with each other through tongue and groove joints.
- Nail down the plywood to the floor frame.
#2. 10×16 Storage Shed Blueprints For Making The Roof Trusses
- One 2×4 ceiling joist and two 2×4 rafters are used for constructing each truss.
- Gussets made of plywood are used to secure these three pieces of wood to each other.
- First construct all the trusses and keep them on the shed floor and then start raising the wall frame. This will help you finish construction of the shed faster.
- Craft each rafter such that it has an angle of 40 degrees at one end.
- Create the lower chord of each truss about 10 feet long.
- First place the sections for one truss on the floor of the shed and position the lower chord with the boundary of the shed floor.
- Make four boards of 24 inches length using 2×4 timber.
- Screw two boards on either side of a rafter and secure them to the shed floor using screws.
- These boards will act as stop blocks for constructing each truss.
- Secure the gussets to either side of each truss using building adhesive and nails.
- Attach the gussets along the joints on either side of all trusses.
#3. 10×16 Shed Plans For Putting Up The Walls
- Craft the sections of the walls using 2x4s and place them on the shed floor.
- Keep a distance of 2 feet between the studs and fasten these using nails.
- Segment the plywood siding as needed and attach it to the wall frame using nails.
- Construct the walls by connecting the sections together with galvanized nails and then attach the sheathing made of plywood.
- Lift each wall into its proper positions and fasten it using deck screws.
- First raise the front wall followed by the back wall and then install the inner separation wall.
- Lastly hoist the side wall taking care that the siding overlaps over the floor frame.
- Connect each wall to the board from the floor frame below it using screws.
#4. Lay The Roof Of Your Backyard Shed
- Begin constructing the roof by putting a sheathed truss at either end of the shed and secure them with deck screws into the upper plate.
- Then attach the remaining trusses. Place one truss over every stud and secure it with nails to the upper plate.
- Make sure you fasten the siding before hoisting the trusses. The sheathing can be strengthened with a chord.
- Keep a space of 2 feet between the trusses.
- First attach plywood covering to the trusses and then secure the shingles onto the roof with nails.
Related: 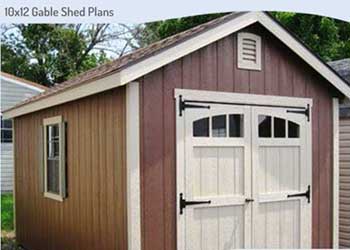
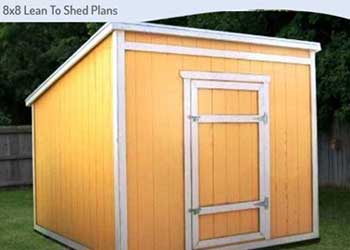
10×12 Storage Shed Plans Blueprints
#5. Setup Doors and Windows Of Your Gable Shed
- Attach pierced hardboard to the central partition using screws.
- Construct a ventilator window over the doors in the gable end of the shed.
- Create the window by putting together a modest wooden frame for accommodating a single pane of glass.
- Make the doors from battens and cedar boards.
- Connect the battens with nails and attach the doors to the frame using three hinges.
- The windows are 2 feet by 3 feet and can be bought readymade from timber yards.
- You can use sashes for making the windows as they can be rotated for allowing air into the room.
- Connect a bolt on top of each window sash so that the windows can be locked.
- Finally coat your shed with paint or use wood stain.